

- Published on
Understanding the Exposure Triangle (ISO, Aperture, Shutter Speed)
- Authors
- Name
- Garrett Hughes
- @garretthughes


One of the core concepts of becoming a better photographer is understanding how light hits the sensor and how you, as the photographer, can manipulate that artistically. This article is going to assume that you have little to no working knowledge of DSLRs. If you are more of a visual learner check this out after you’ve read the article.
The formula
Image brightness ∝ Scene illumination × Subject reflectivity × Lens aperture area × Shutter open time × ISO sensitivity.
or a tad simplified
Image brightness ∝ Lens aperture area × Shutter open time × ISO sensitivity.
Easy enough, right?
Preface
There are multiple different “modes” DSLRs can be put in (aperture priority, shutter speed priority, full manual, etc). I’ll briefly touch on those towards the end of the article and what situations I personally use them for.
Shutter Speed
This is the amount of time the shutter stays open. As you may imagine, the longer It is open, the more light is let in. The difference between 1/2000" of a second and 30 seconds are magnitudes in terms of light. Traditionally (now it’s a little skewed with vibration control within camera bodies) you don’t want to go below 1/125" if you are handholding a camera. If you are shooting action sports you should aim for a minimum of ~1/500" depending on the sport. Not only does shutter speed effect the duration light hits the sensor, it is registering each item within the picture. A concrete example would be a basketball player. If you take a photo at 1/60 of a second he’s moving too fast. Below is an example of that.
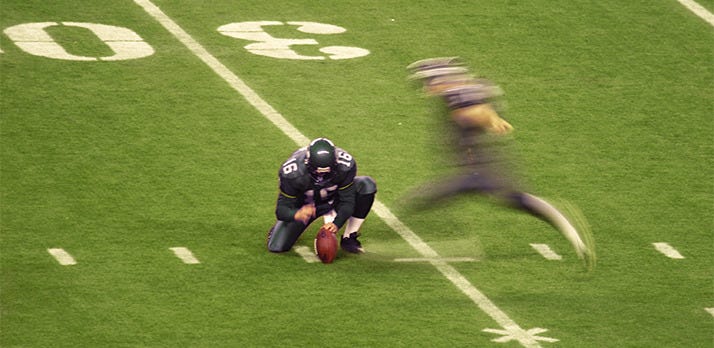
Notice how the kicker is blurred here (and even the holders hands). This is mainly why you want to aim for 1/500 or faster for shutter speed of action sports
With portraits you can go a tad lower as the model (usually) isn’t moving too much. 1/125 is perfectly fine here. When you get to landscapes, they generally don’t move at all, and you can go much longer exposure here if you have a tripod. Here is something that is much slower in shutter speed on a tripod. Notice how all of the water is almost air brushed.
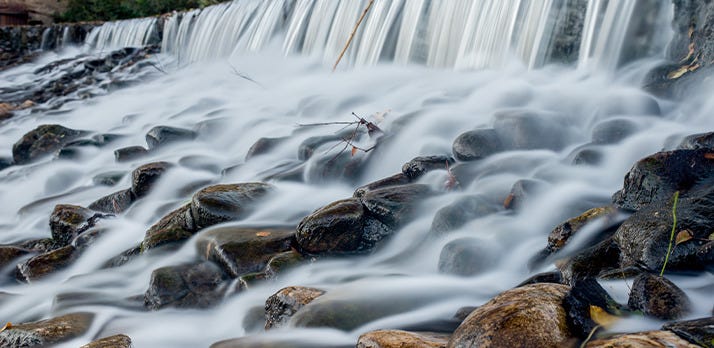
A common use for long exposure in landscapes if for moving water. Google “long exposure waterfall”, you won’t be disappointed.
Aperture (also known as f stop)
Aperture controls how much light is let into your sensor (technically how open or closed the blades are). The most confusing things is that aperture is inverse of the amount of light it lets in. I.e. f1.4 aperture lets in more light than f16. At 1.4 the blade is open usually all of the way (1.4 is a high aperture)… you can tell what range your lens has by looking at the lens body or looking at your lens model (I.e. 50mm 1.4 means it goes to 1.4 aperture).
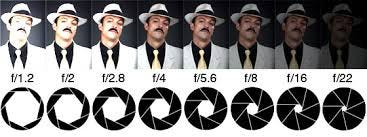
The lower the number the wider the blades are meaning more light let in to hit the sensor
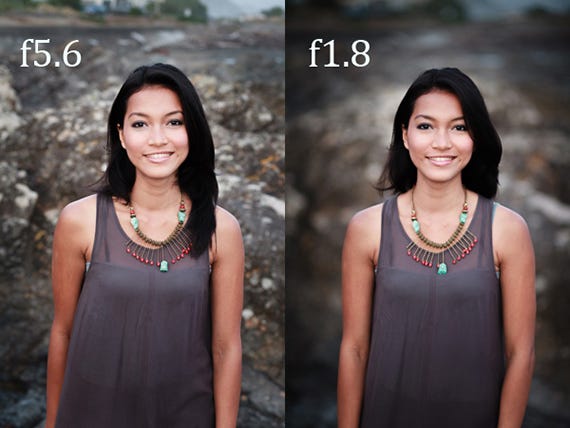
The higher (lower number) the f-stop, the higher the bokeh effect is. You can see that in most portraits that you see (a lot of people like to shoot on 85mm up to 300mm anywhere from 1.4 – 4.0.
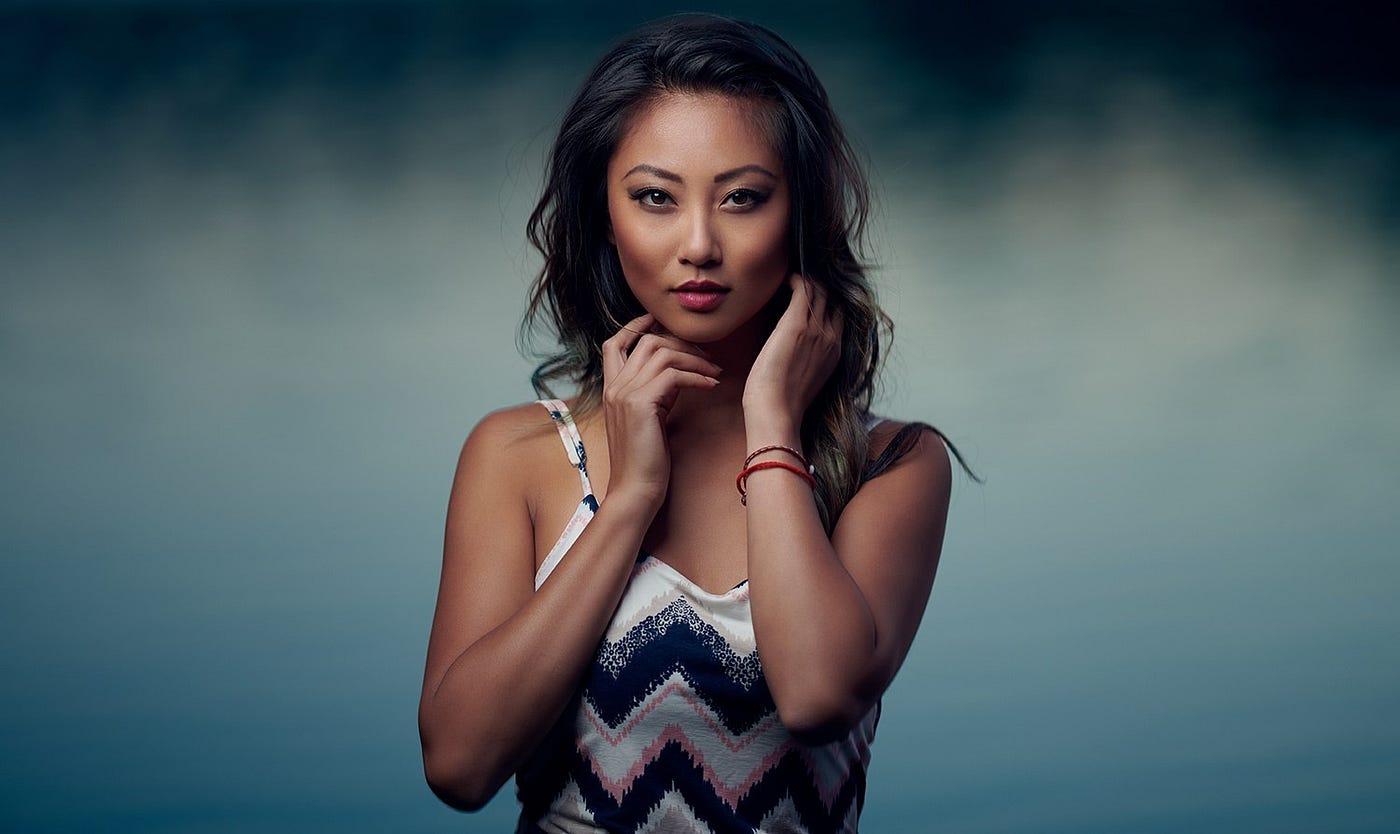
Notice how blurred out the background is
another example of how depth of field changes with aperture alteration:
ISO
The last piece of the exposure triangle is ISO. This is the sensitivity of the sensor to light. On crop frame (DX) cameras you usually don’t have the same ability to capture high iso images as you do on full frame cameras (FX). The caveat here is the new mirrorless DSLR’s…as technology is increasing, so is the ability to handle high ISO. The higher the ISO, the more grain (aka noise) will be introduced. This varies camera from camera so I suggest you try to push the limits on your camera to see where you feel comfortable pushing the ISO. On my Nikon D850 I feel fine pushing 6400 (sometimes higher) in most scenarios.

notice the noise on the higher ISO image on the right
Afterthoughts on real world application
Shutter speed priority
Shutter speed priority is a camera mode that you manually set a shutter speed and the camera will determine what ISO and Aperture to use to meet that requirement. I.e. if it is a sunny day and you are shooting your family playing football you’ll set your shutter speed to 1/4000" and the camera will decide that f11 and ISO 100 are the best settings to achieve the optimal image. I use this mode rarely but when I do it’s when shooting surf photography. When it’s in the housing I want to maintain a 1/500" or so shutter speed and this helps accomplish that. I’m fine with pushing the ISO to accommodate when in the barrel and have the aperture fluctuate (mostly).
Aperture priority
Aperture priority is what I mainly shoot in. This is, as you can imagine, when you define what aperture you want to shoot a photo at and let the camera decide the shutter speed and ISO. When I’m shooting I’ll try and calculate the depth of field of my subject (I.e. my Land Rover) and want to ensure that what I’m shooting will be in focus. Just make sure to keep an eye or listen to the shutter speed. If you are hand holding don’t let it go below ~1/125" depending on the internal stabilization your camera has.
ISO bounds
A lot of newer cameras have a new setting which is an acceptable bounds range for ISO where you can set the maximum and minimum acceptable value (I.e. 200–800). While I don’t use this too often it can certainly be helpful on crop sensors where ISO is a tad more influential on the outcome of the image.
I hope this was a useful guide. Check out this live example here to play around with the effects of changing settings. Feel free to drop me a line on my website or comment here and I’ll happily reply with any feedback and/or missed content.